Control arm ball joint replacement involves removing a worn or damaged ball joint from the control arm and installing a new one, either by pressing out the old joint or replacing the entire control arm assembly. The process requires specialized tools and technical knowledge to maintain proper suspension geometry and vehicle safety.
This guide is for off-road vehicle owners and builders who need to understand when ball joint replacement is necessary, what the process involves, and how to choose between repair and upgrade paths. You'll learn the difference between serviceable and sealed designs, the real cost of replacement versus rebuild, and why some ball joints fail prematurely on lifted vehicles.
- How to identify worn ball joints before they fail on the trail
- The tools and steps required for ball joint replacement
- Why sealed ball joints often require full control arm replacement
- How rebuildable ball joint systems reduce long-term maintenance costs
What Is a Control Arm Ball Joint?
A ball joint connects your vehicle's control arm to the steering knuckle. It allows your vehicle's wheels to move up and down with suspension travel while also pivoting for steering input. The ball stud sits inside a housing with a bearing surface, sealed by a rubber or polyurethane boot.
Upper and lower control arms each have their own ball joints. Lower ball joints typically bear more load because they support the vehicle's weight. Upper ball joints primarily control wheel alignment and provide a pivot point for the steering knuckle. Both are critical to safe vehicle operation.
Ball joints wear over time from constant articulation, road debris, and contamination. Off-road vehicles experience accelerated wear due to increased articulation angles, shock loading from obstacles, and exposure to mud, water, and dust that penetrate worn boots.
When Does a Ball Joint Need Replacement?
A ball joint requires replacement when the boot tears, the joint develops excessive play, or the stud separates from the housing. Torn boots allow grease to escape and contaminants to enter, which accelerates wear. You'll feel loose steering, hear clunking over bumps, or notice uneven tire wear when ball joints fail.
Check the ball joints by jacking the vehicle and grabbing the tire at the 12- and 6-o'clock positions. Push and pull to detect vertical play. Then grab at 3 and 9 o'clock and rock the tire to check for horizontal play. Any movement at the ball joint indicates wear. A mechanic can measure play with a dial indicator to confirm that it exceeds the manufacturer's specifications.
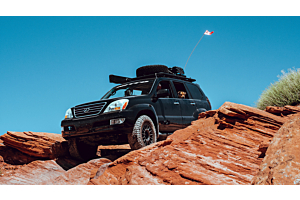
Lifted vehicles often need ball joint replacement sooner than stock-height trucks. A lift kit changes suspension geometry and increases the angle at which ball joints operate. Standard ball joints with 45-degree articulation reach their limit quickly, which concentrates wear on one side of the bearing surface and tears the boot. This is why aftermarket ball joints with 90-degree articulation exist.
Can You Replace Just the Ball Joint on a Control Arm?
You can replace just the ball joint if the control arm is designed with a pressed-in or bolt-in joint. Many factory control arms use pressed-in ball joints that require a hydraulic press or ball joint press tool to remove and install. Aftermarket control arms may use bolt-in joints secured with a castle nut and cotter pin for easier replacement.
However, many modern factory control arms come with sealed, non-serviceable ball joints. The joint is permanently riveted or welded to the arm. When the ball joint fails, you must replace the entire control arm assembly. This is common on late-model trucks and SUVs, where manufacturers prioritize low initial cost over long-term serviceability.
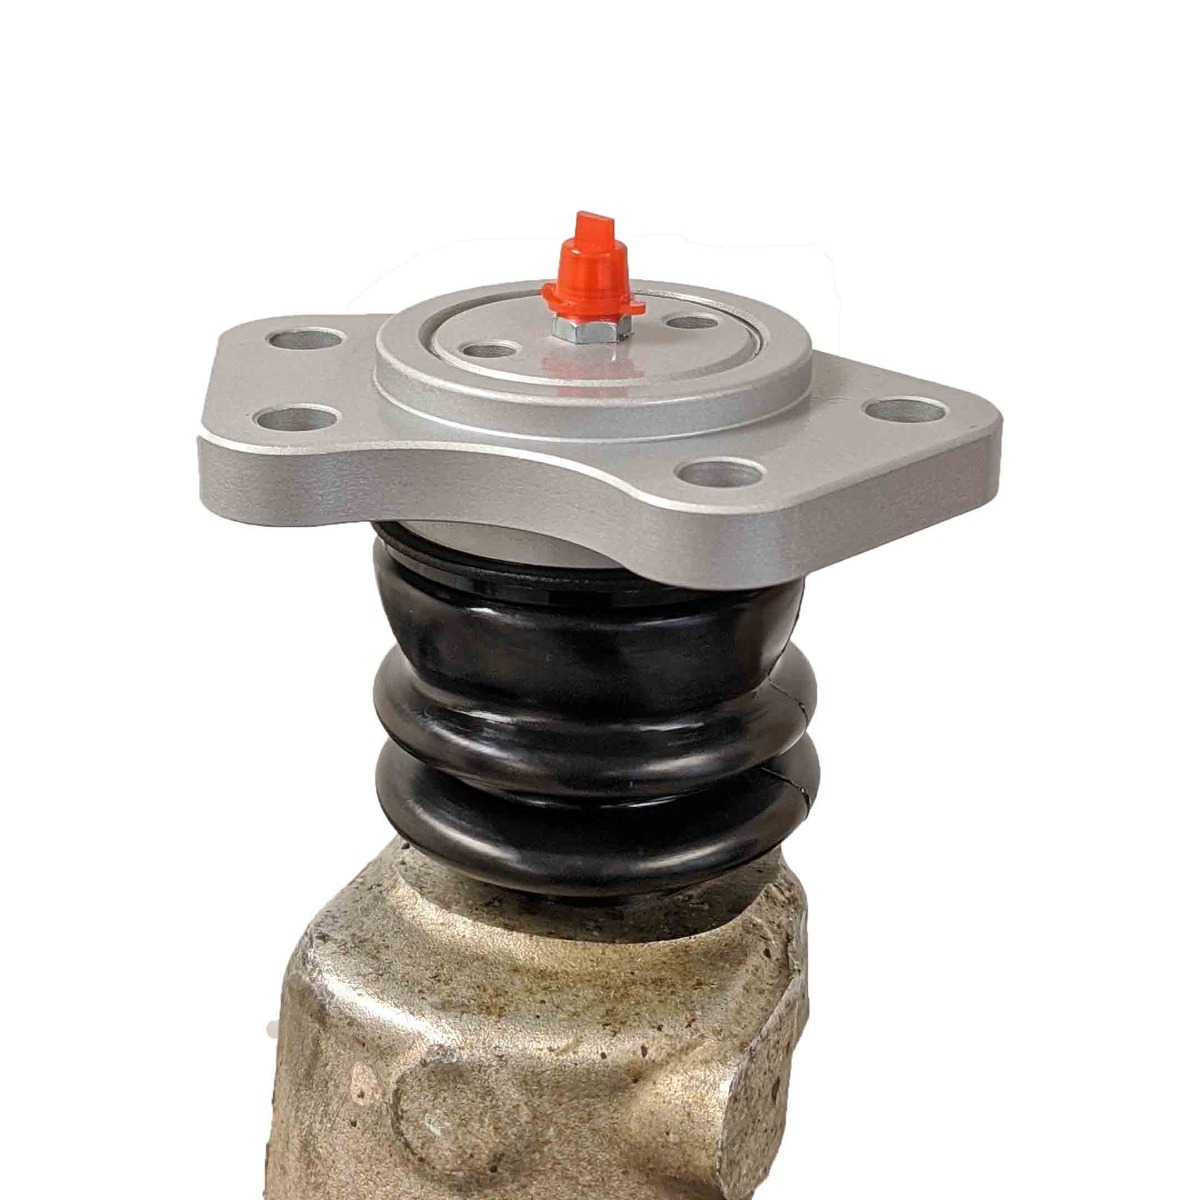
Rebuildable ball joint systems offer a third option. JBA Offroad's Max 90 Ball Joints feature a threaded design that lets you replace the ball stud, bearing, and boot without removing the control arm from the vehicle. You unbolt the joint body, install new internal components, and reinstall. This eliminates the need for a press and reduces the cost of control arm replacement to under $100 per joint.
How Much Does Control Arm Ball Joint Replacement Cost?
Replacement cost depends on whether you replace just the ball joint or the entire control arm, and whether you do the work yourself or pay a shop. A single aftermarket ball joint costs $30 to $80. A complete upper control arm with integrated ball joint and bushings costs $150 to $600, depending on materials and features across different control arm models.
Shop labor for ball joint replacement runs $200 to $400 per arm. The mechanic must support the suspension, disconnect the ball joint from the knuckle, press out the old joint, press in the new joint, reassemble, and perform an alignment. The total cost for professional upper ball joint replacement on one side typically runs $300 to $500.
Lower control arm ball joint replacement costs more because lower ball joints are larger and require more labor to access. Expect $350 to $600 per side, including parts and labor. If you replace the entire control arm instead of pressing in a new ball joint, labor drops slightly, but parts cost increases.
Rebuildable systems reduce long-term costs. A Max 90 Ball Joint rebuild kit costs $89 and takes 30 minutes per joint with hand tools. Over five years and multiple rebuilds, you save $800 to $1,200 per vehicle compared to replacing sealed ball joints or full control arms multiple times.
What Tools Do You Need for Ball Joint Replacement?
Ball joint replacement requires a floor jack, jack stands, a ball joint separator or pickle fork, a torque wrench, and either a ball joint press or C-frame press. You also need basic hand tools, including a socket set, wrenches, and a hammer.
A ball joint press is a specialized tool that uses threaded rods and adapters to push the old joint out of the control arm and press the new joint in. C-frame presses work for most applications but require the correct adapter set for your joint diameter. Hydraulic shop presses offer more control but require removing the control arm from the vehicle.
Some builders replace ball joints without a press by using a large socket or a piece of pipe as a driver to hammer the joint out. This risks damaging the control arm or the new joint. A proper press distributes force evenly and ensures the joint seats fully seat in the bore.
Rebuildable ball joints eliminate the need for a press entirely. The threaded design means you remove four bolts, unscrew the joint body, replace the internal components, and reinstall. You need only a 3/4-inch socket, a torque wrench, and grease.
How Do You Replace a Ball Joint Step by Step?
Start by lifting the vehicle and supporting it on jack stands. Remove the wheel. Disconnect the ball joint from the steering knuckle by removing the castle nut and using a ball joint separator or pickle fork to break the taper. Support the knuckle with a jack or strap so it doesn't hang on the brake line.
If the control arm has a pressed-in ball joint, remove the control arm from the vehicle by unbolting it at the frame and cam bolt locations. Place the arm in a ball joint press with the correct adapters. Press the old joint out, clean the bore, and press the new joint in until it seats against the shoulder. Reinstall the control arm, torque all fasteners to spec, and reconnect the ball joint to the knuckle.
If the control arm uses a bolt-in ball joint, you may not need to remove the arm. Unbolt the joint from the control arm, install the new joint, torque the bolts, and reconnect to the knuckle. Always install a new cotter pin through the castle nut to lock it in place.
After replacement, you must perform a wheel alignment. Replacing ball joints or control arms changes camber, caster, and toe settings. Driving without an alignment causes uneven tire wear and poor handling.
Why Do Control Arm Ball Joints Fail?
Ball joints fail because the boot tears, grease escapes, and contaminants enter the bearing surface. Dirt, water, and road salt act as abrasives that wear the ball stud and socket. Once wear creates excessive play, the joint can separate under load.
Lifted vehicles accelerate ball joint failure by operating the joint at extreme angles. A 3-inch lift increases the angle between the control arm and knuckle, which concentrates load on one side of the bearing. Standard ball joints with 45-degree articulation reach their limit, causing the boot to tear and creating uneven wear. This is why lifted trucks often need ball joint replacement every 20,000 to 40,000 miles.
Sealed ball joints fail faster than greaseable joints because you cannot add fresh lubricant. Factory-sealed joints contain a lifetime supply of grease, but that lifetime assumes a stock ride height and typical road use. Off-road articulation and contamination deplete grease quickly. Without a grease fitting, you cannot extend service life.
JBA Offroad's EZ Lube Bushings address this by featuring eight individual grease ports and pressure-relief valves. You pump fresh grease into each zerk fitting, which purges contaminated grease and maintains a protective film on bearing surfaces. Combined with Max 90 Ball Joints that offer 90-degree articulation, the system eliminates the geometry and lubrication failures that destroy sealed joints on lifted vehicles.
Should You Replace Ball Joints in Pairs?
Replace ball joints in pairs on the same axle. If one upper ball joint has worn enough to require replacement, the opposite side has experienced the same loads and articulation cycles. Replacing only one side leaves you with mismatched wear and a high likelihood that the second joint will fail within a few thousand miles.
Replacing in pairs also ensures consistent suspension geometry and alignment. New ball joints have tighter tolerances than worn joints. Mixing new and worn components on the same axle creates asymmetric alignment settings that affect handling and tire wear.
This recommendation applies to both upper and lower ball joints. If your lower ball joints are worn, replace both lowers. If your uppers are worn, replace both uppers. You do not need to replace uppers and lowers simultaneously unless both have failed.
What Is the Difference Between Upper and Lower Ball Joint Replacement?
Lower ball joint replacement typically requires more labor because the joint is larger and bears more load. The lower control arm supports the vehicle's weight, which means the ball joint is under constant compression. This requires a larger diameter stud and socket, which increases the press force required for removal and installation.
Upper ball joints are smaller and primarily control alignment. They experience less vertical load but more angular movement during steering and suspension articulation. Upper ball joints on lifted vehicles often fail first because the lift increases operating angle beyond the joint's design limit.
Replacement procedures are similar for both. The main difference is access. Lower control arms often require disconnecting sway bar links, shock absorbers, or steering linkage to create clearance. Upper control arms typically have clearer access but may require disconnecting brake lines or ABS sensors.
How Do Rebuildable Ball Joints Change Maintenance?
Rebuildable ball joints let you replace worn internal components without removing the control arm from the vehicle. The joint body remains bolted to the arm. You remove four bolts, unscrew the threaded joint body, pull out the old ball stud and bearing, install new components, and reassemble. The process takes 30 minutes per joint with hand tools.
This eliminates the need for a ball joint press, a shop visit, and a post-replacement alignment. You rebuild the joint in place, which maintains existing alignment settings. You save $200 to $400 in labor per axle and reduce vehicle downtime from a full day to under an hour.
Rebuildable systems also extend service intervals. JBA Offroad's Max 90 Ball Joints feature CNC-machined 4140 chromoly steel components with hardened bearing surfaces. The threaded design distributes load evenly across the bearing, which reduces wear compared to pressed-in joints that concentrate stress at the press-fit interface. Combined with greaseable EZ Lube Bushings, the system delivers 60,000 to 80,000 miles between rebuilds, even on lifted vehicles with 35-inch tires.
The lifetime structural warranty on JBA control arms covers the arm itself, not wear items like ball joint internals or bushings. However, because you can rebuild the joints and replace bushings without replacing the arm, the assembly lasts the life of the vehicle. You pay for maintenance parts, not full replacements.
When Should You Replace the Entire Control Arm Instead of Just the Ball Joint?
Replace the entire control arm if the arm is bent, cracked, or corroded. Impact damage from rock strikes or hard landings can bend the arm, which changes suspension geometry and causes alignment problems even with a new ball joint. Cracks in the arm structure indicate fatigue failure and will propagate under load.
Replace the arm if the bushings are worn and not serviceable separately. Many factory control arms use pressed-in bushings that require specialized tools to replace. If both the ball joint and bushings are worn, replacing the entire arm with an upgraded aftermarket unit costs less than rebuilding the factory arm.
Consider replacing it with an upgraded control arm if you have lifted your vehicle. Factory arms are engineered for stock geometry. A lift kit changes the operating angle of ball joints and bushings, which accelerates wear. Aftermarket control arms designed for lifted applications use larger ball joints with increased articulation, relocated mounting points to correct geometry, and greaseable bushings for extended service life.
JBA Offroad's Gen 4.5 upper control arms for Jeep and Toyota platforms replace the entire factory assembly with a chromoly steel arm, Max 90 Ball Joints with 90-degree articulation, and EZ Lube Bushings with eight grease ports, similar to the engineering found in the 2013 Chevy Silverado lineup. The design corrects the ball joint angle on lifted vehicles, eliminating premature wear that would otherwise require replacement every 20,000 miles. The rebuildable system means you never replace the arm again.
Frequently Asked Questions
Can you replace just the ball joint on a control arm?
Yes, if the control arm uses a pressed-in or bolt-in ball joint. Many factory and aftermarket arms allow ball joint replacement with a press or hand tools. However, some modern factory arms have sealed, non-serviceable ball joints that require replacing the entire control arm assembly when the joint fails.
How much does it cost to replace a ball joint on a lower control arm?
Lower control arm ball joint replacement costs $350 to $600 per side, including parts and labor at a shop. The ball joint itself costs $40 to $100, and labor runs $250 to $400 because lower joints are larger and require more disassembly. DIY replacement with a ball joint press reduces the cost to parts only.
Can I drive my car with a bad ball joint?
No. A failed ball joint can separate under load, causing the wheel to collapse and resulting in loss of control. If you hear clunking, feel loose steering, or see a torn boot, stop driving and inspect the joint immediately. Driving on a worn ball joint poses the risk of catastrophic failure and a crash.
What causes a control arm ball joint to go bad?
Ball joints fail when the boot tears, allowing grease to escape and contaminants to enter. Dirt and water act as abrasives that wear the bearing surface. Lifted vehicles accelerate failure by operating joints at extreme angles that exceed design limits, which tears boots and concentrates wear on one side of the bearing.
Conclusion
Control arm ball joint replacement is a critical maintenance task that directly affects vehicle safety and handling. Sealed factory ball joints often require full control arm replacement when they fail, increasing costs and downtime. Rebuildable ball joint systems reduce long-term maintenance costs by allowing you to replace internal components without removing the control arm or performing an alignment.
For off-road vehicles operating at lifted ride heights, standard ball joints with 45-degree articulation fail prematurely due to increased operating angles and contamination. Upgrading to control arms with 90-degree ball joints and greaseable bushings eliminates these failure modes and extends service intervals to 60,000 miles or more. Shop UCAs backed by a lifetime structural warranty at JBA Offroad.